Toy Run Tuesday #59 - In Depth Look at KDK TIE Fighter Hangar Rack!
Welcome back, Toy Runners! It’s another fine Tuesday morning, and I have some photos of my new diorama set to share. I posted a picture of it on Facebook a couple days ago, but wanted to share a little more about my build process. Huge shout out to Krazy D Kustoms for these wonderful pieces. Click here to check it out!
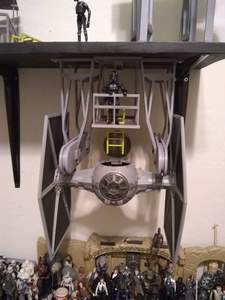
I reached a milestone on Facebook in the Star Wars Diorama Collections group. I posted a picture of the final display of these TIE Fighters, and it received over 500 reactions! I’ve never had a post get that big before. These TIE Fighter hangar racks are absolutely wonderful, and it’s easy to see why.
Krazy D’s Kustoms does amazing work when it comes to 3d printing. They have a wide variety of diorama parts that require minimal finishing and look amazing. They also have great prices. These hangar racks were $30 a piece including shipping (price may go up after the first promotional batch is sold through). I want to provide an honest review of these hangar racks and give a few tips for assembling them to save yourself some trouble if you decide to pick them up for yourself.
One nice thing about these prints is they don’t have a lot of small pieces. I’ve gotten a couple other sets from KDK and they often have a lot of tiny parts and unfortunately no instructions to see where they go. These hangar racks are quite easy to assemble and you don’t have to search through countless parts to get it all together. This photo shows an overview of the major components and how they come together to form the 2 main units of the set – the braces and the catwalk.
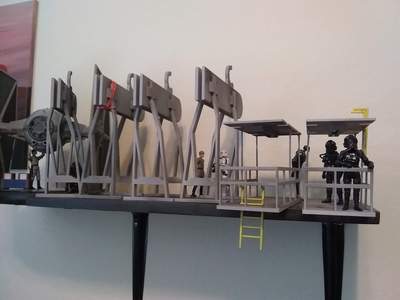
As you can see, the catwalks are the perfect size for 3.75 figures and don’t take up so much space that the set become unusable. I used a 2 part plastic epoxy to glue together the braces and rails, as well as the catwalks to provide some extra support over superglue. The braces/rails fit snugly with no modification, but the posts of the catwalks needed a little sanding/shaving down to fit in the holes of the top and bottom.
Here you can see how the rack assembles on the shelf. Make sure you face the braces the right way (vertical side outward by the wings). The braces don’t sit quite flush with the ceiling portion of the catwalk, so be sure to put one brace up, then the middle section, then the other brace.
Before a finished product photo, I wanted to share a few tips.
- While these are very well constructed, they are 3d prints, and too much stress or bending will break pieces.
- The braces and catwalks have holes to screw them into the shelf above. #6 bolts/nuts work great, and you can get packs of 11 of them for $1 at Walmart (each set requires 10 bolts/screws).
- Don’t screw them in too tight, as you risk separating the layers of the 3d print.
- Use rustoleum filler/primer to get rid of some of the print lines.
- Be sure you get the placement right before drilling holes in your shelf…
I finished this project in I’d say around 6-8 hours total over a few days. It was a fun build, and I am VERY happy with the final product! Now on to the top of the shelf. Please check out Krazy D Kustoms if you need some new parts for your dioramas!
Related Links
-Click HERE to return to the home page-


![Jango Fett (Kamino Escape) - SW [S - P3] - Basic (’03 #20) Jango Fett (Kamino Escape) - SW [S - P3] - Basic (’03 #20)](/galleries/2016/Review_JangoFettKaminoEscapeSWSP3/thumbnails/Review_JangoFettKaminoEscapeSWSP3009.jpg)